
DeltaV SaaS SCADA Mobile App
Last modified:
DeltaV SaaS SCADA Mobile App
Contents
- DeltaV SaaS SCADA Mobile App.
- Installation.
- Login.
- Home Page.
- To Add a Run.
- Dashboards.
- Options.
- Locations/Map Tab.
- Alarms.
- Sensors.
- Reports.
This guide will help users navigate the DeltaV SaaS SCADA Mobile App.
Installation
The DeltaV SaaS SCADA Mobile app is available in the Google Play Store for Android user and in the Apple App Store for iPhone users. This is a free app available to everyone, however only users of the DeltaV SaaS SCADA platform will be able to sign in.

Login
The first time that you select the app, select to allow notifications. This would enable DeltaV SaaS SCADA to send alarm notifications (if alarm notifications are enabled) to your cell phone.

Login credentials will be the same username and login as the DeltaV SaaS SCADA platform.
To Login:
1. Select Standard User.
a. Enter your Username and Password.
2. Select if you would like to DeltaV SaaS SCADA to access this Device’s Location:
a. While using the app
b. Only this time
c. Don’t allow


Home Page
Users will be taken to their company’s home page. The first time that you log in, there will be no locations selected.
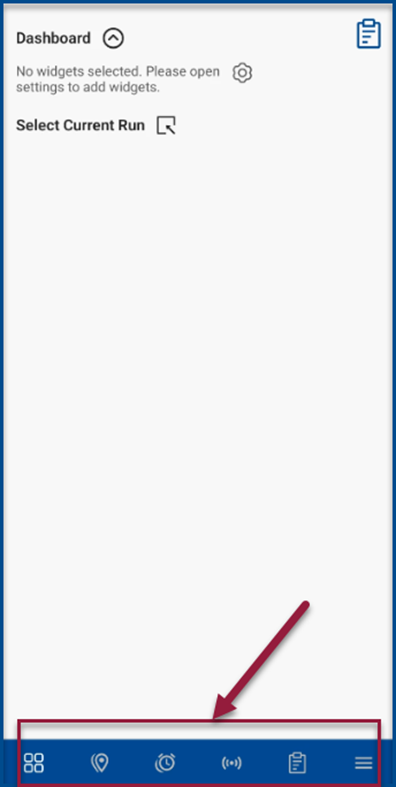
There are 6 icons on the bottom of your screen.
From left to right:
Dashboards -> Locations -> Alarms -> Sensors -> Reports -> Options
To Add a Run
There are 2 ways to add a run.
Select from a previously created run by:
1. Select Current Run, then select the arrow next to the name.


Create a new run:
1. Select the options icon and Create Run.


2. Select the note pad next to Create Run. Enter in a name of the run and select Apply.
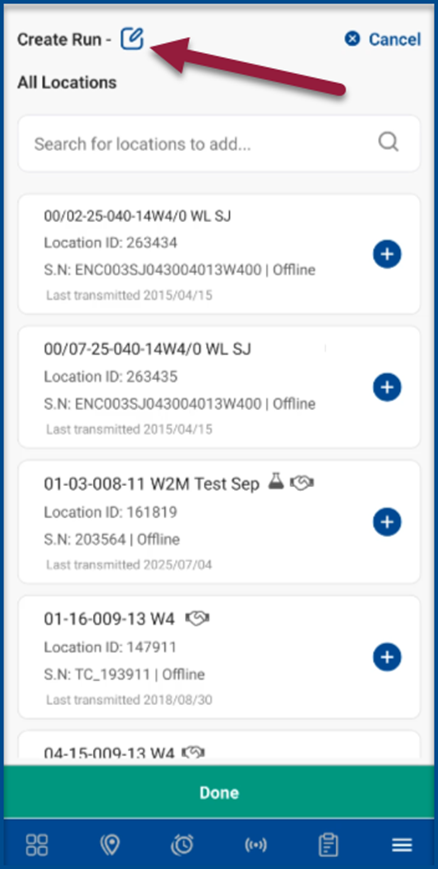
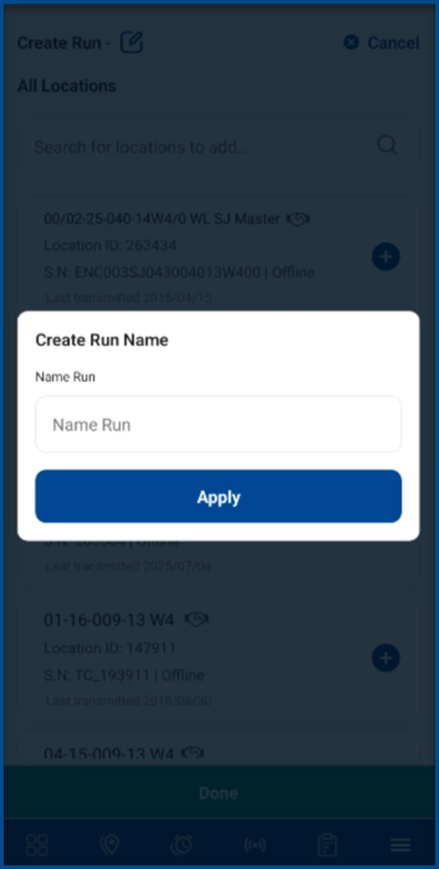
3. Now add locations by selecting the + and select Done to complete.

Dashboards

This is the main home page.
1. Total Alarms (Widget): for selected locations.
a. Select the clock to view and acknowledge an alarm.

2. Production Volume Y-Day and 2-day (Widgets): from the selected run.
3. Locations: These are the locations currently selected in a scrollable list.
a. Click on a location tile for a shortcut to view filtered alarms (if any on selected node). View sensors on that node, or directions to the location. Ensure you have Google maps installed.
4. Click on the run name for shortcut to change run.
5. Click on the chart icon for summary reporting on those locations.
![]()

Options


1. Browse Locations: Allows you to search and add locations to view, that are not included in a run.
a. Select the “+” to add a location.
b. Select Done to complete.

2. Create New Run. Click to see To Add a Run
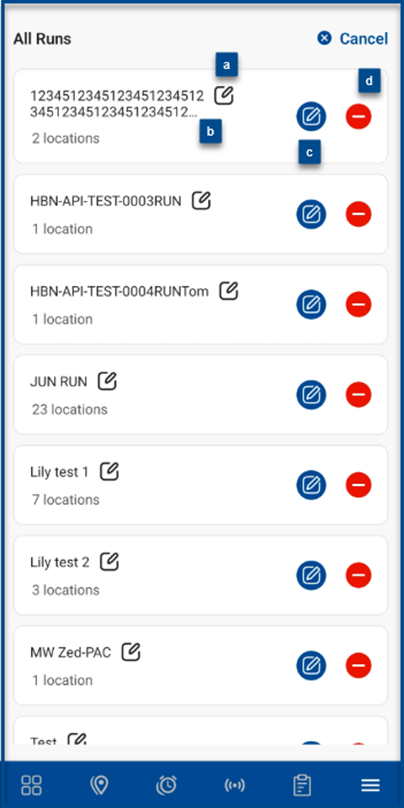
3. Edit Run: Select to edit existing run.
a. Select the pencil beside the name to edit the name of the run.
![]()
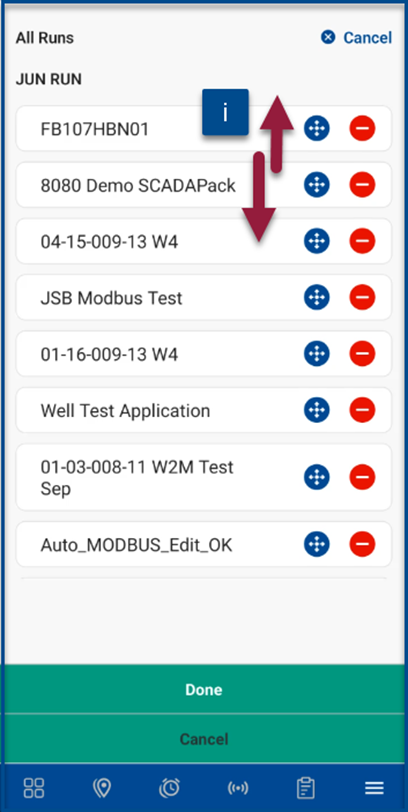
b. Select the name of the run to edit the flow of the locations.
i. Press and drag the “+” to move the location in the run.
![]()
c. Select the pencil on the right to add and remove locations.
![]()
d. Select the “-“ to delete run.
![]()
e. Select Done to complete.
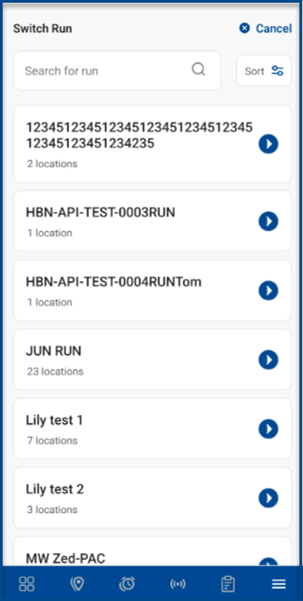
4. Switch Run: Select to change the current run.
5. Contact us: Email our Customer Care team for any questions or issues.

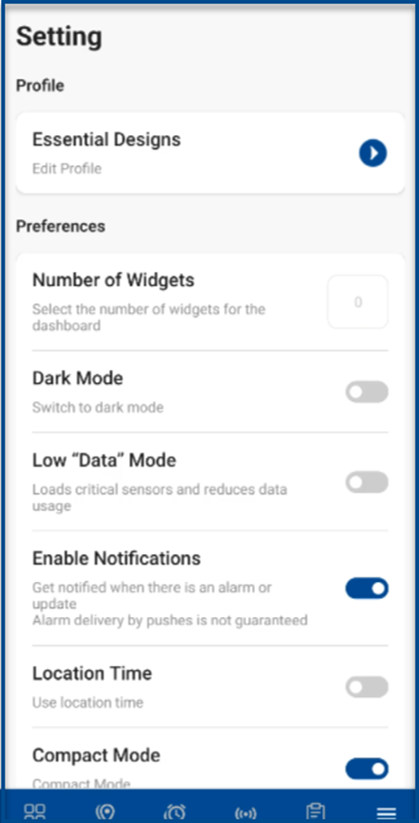
6. Settings: Adjustable settings in the app.
a. Edit Profile: Edit your name and email.
b. Number of Widgets: Adjust the number of widgets in the app. Widget categories include Total Alarms, Production Volume 2-day, Production Volume Y-day.
c. Dark Mode: Toggle on for dark mode.
d. Low “Data” Mode: Toggle on for low data mode.
e. Enable Notifications: Toggle on for alarm and update notifications.
f. Location Time: Toggle on to use location time.
g. Compact Mode: Toggle on to use compact mode.
7. Learning Center: This will direct the user to the learning center.

8. Logout: Select to logout of DeltaV SaaS SCADA Mobile.
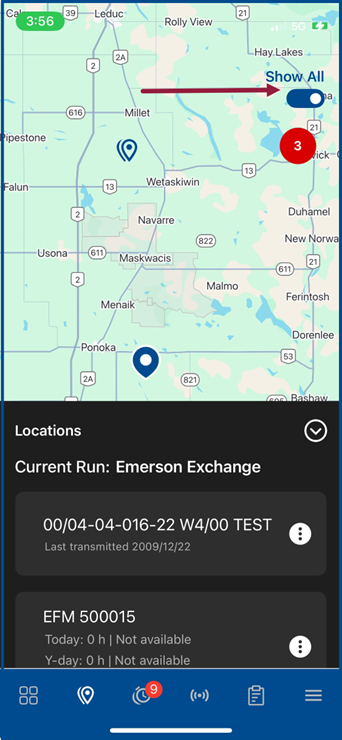
Locations/Map Tab

This tab will default to center on the current locations selected.
1. Toggle: In the top right toggle to show all the locations in your vicinity. If this is turned off it will only show locations in your currently selected run.
2. Select a location to:
a. View Alarms: If there are no alarms you won’t see an option here.
b. View Sensors: Redirects to the sensor page of that location.
c. Driving Directions: Get directions to this location.
d. Add or Remove: Add or remove the location to the currently selected run/route.
e. Cancel.

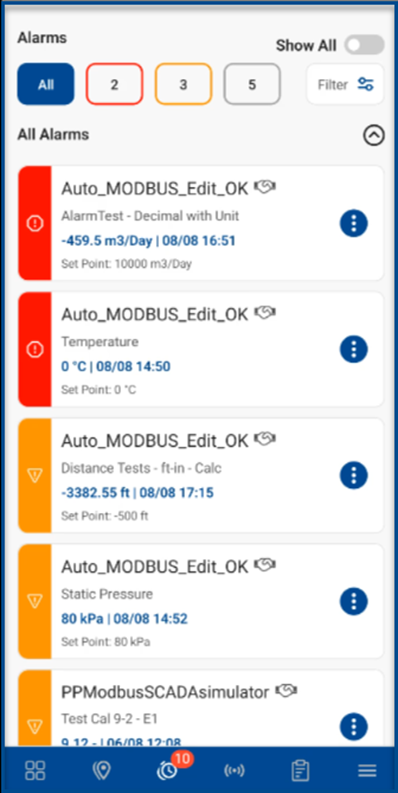
Alarms

1. Active Alarms Pannel: These will be only in the currently selected run.
2. Show All: Toggle on to view all alarms for your company.
3. Filter: Filter by alarm type: High High / Low Low (Red), High/Low (Yellow), No Communication (Grey).
4. Clear/Acknowledge: Select to Clear and Acknowledge alarms from this page. Enter in notes if applicable and Submit. This will clear the alarms from the alarms panel.
![]()

Sensors

1. View sensors: Sensors will display associated with the location selected.
2. Scroll: The top of the page will show 1 to 25 locations, depending on how many locations are in your run. Use the arrows to switch between locations.
3. Demand Poll: If the device is SCADA you can initiate a demand poll.
4. Notes: Site notes are located next to the demand poll button.

5. Sensor Icons: These will be updated based on alarm status.
a. Select the sensor to view the trending graph.
b. Select the down arrow download the graph.
c. Select the triangle to share the graph. (via options on your phone).

d. Sensors Panel: The panel will have multiple pages which can be swiped and scrollable.
e. Write: For those locations with write options, users can write to the device.

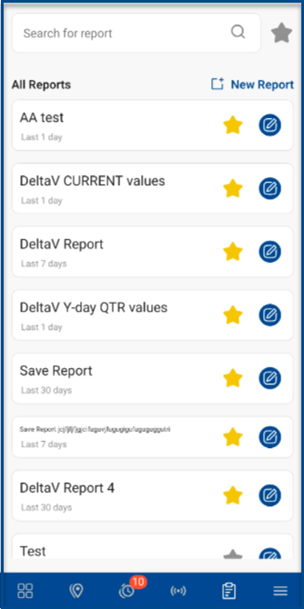
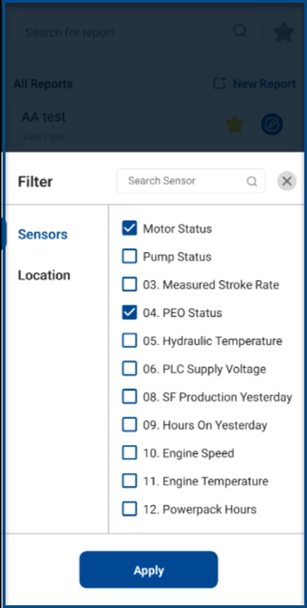
Reports

1. All reports: Select pre-created “favorited” reports for sites selected.
2. New Report: Select New Report to create a custom report, with filter options for sensors and date ranges.
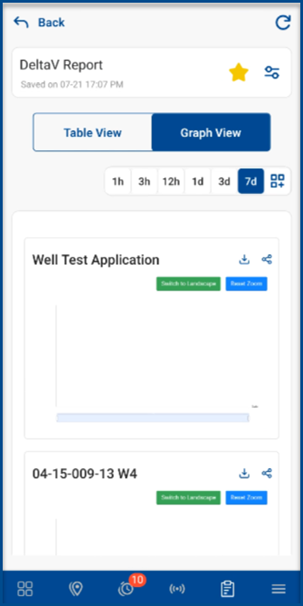
3. Viewing reports: Two different views.
a. Table view which is a tabular view of sensors.
b. Graph view where you can compare the report sensors across multiple locations.
4. Exporting Reports: These reports can be exported and saved to your phone, or emailed.
☁️ DeltaVSaaS.Support@Emerson.com | 📞 866 732 6967 | 🌐 Global Support