Summary Tab

Youtube video

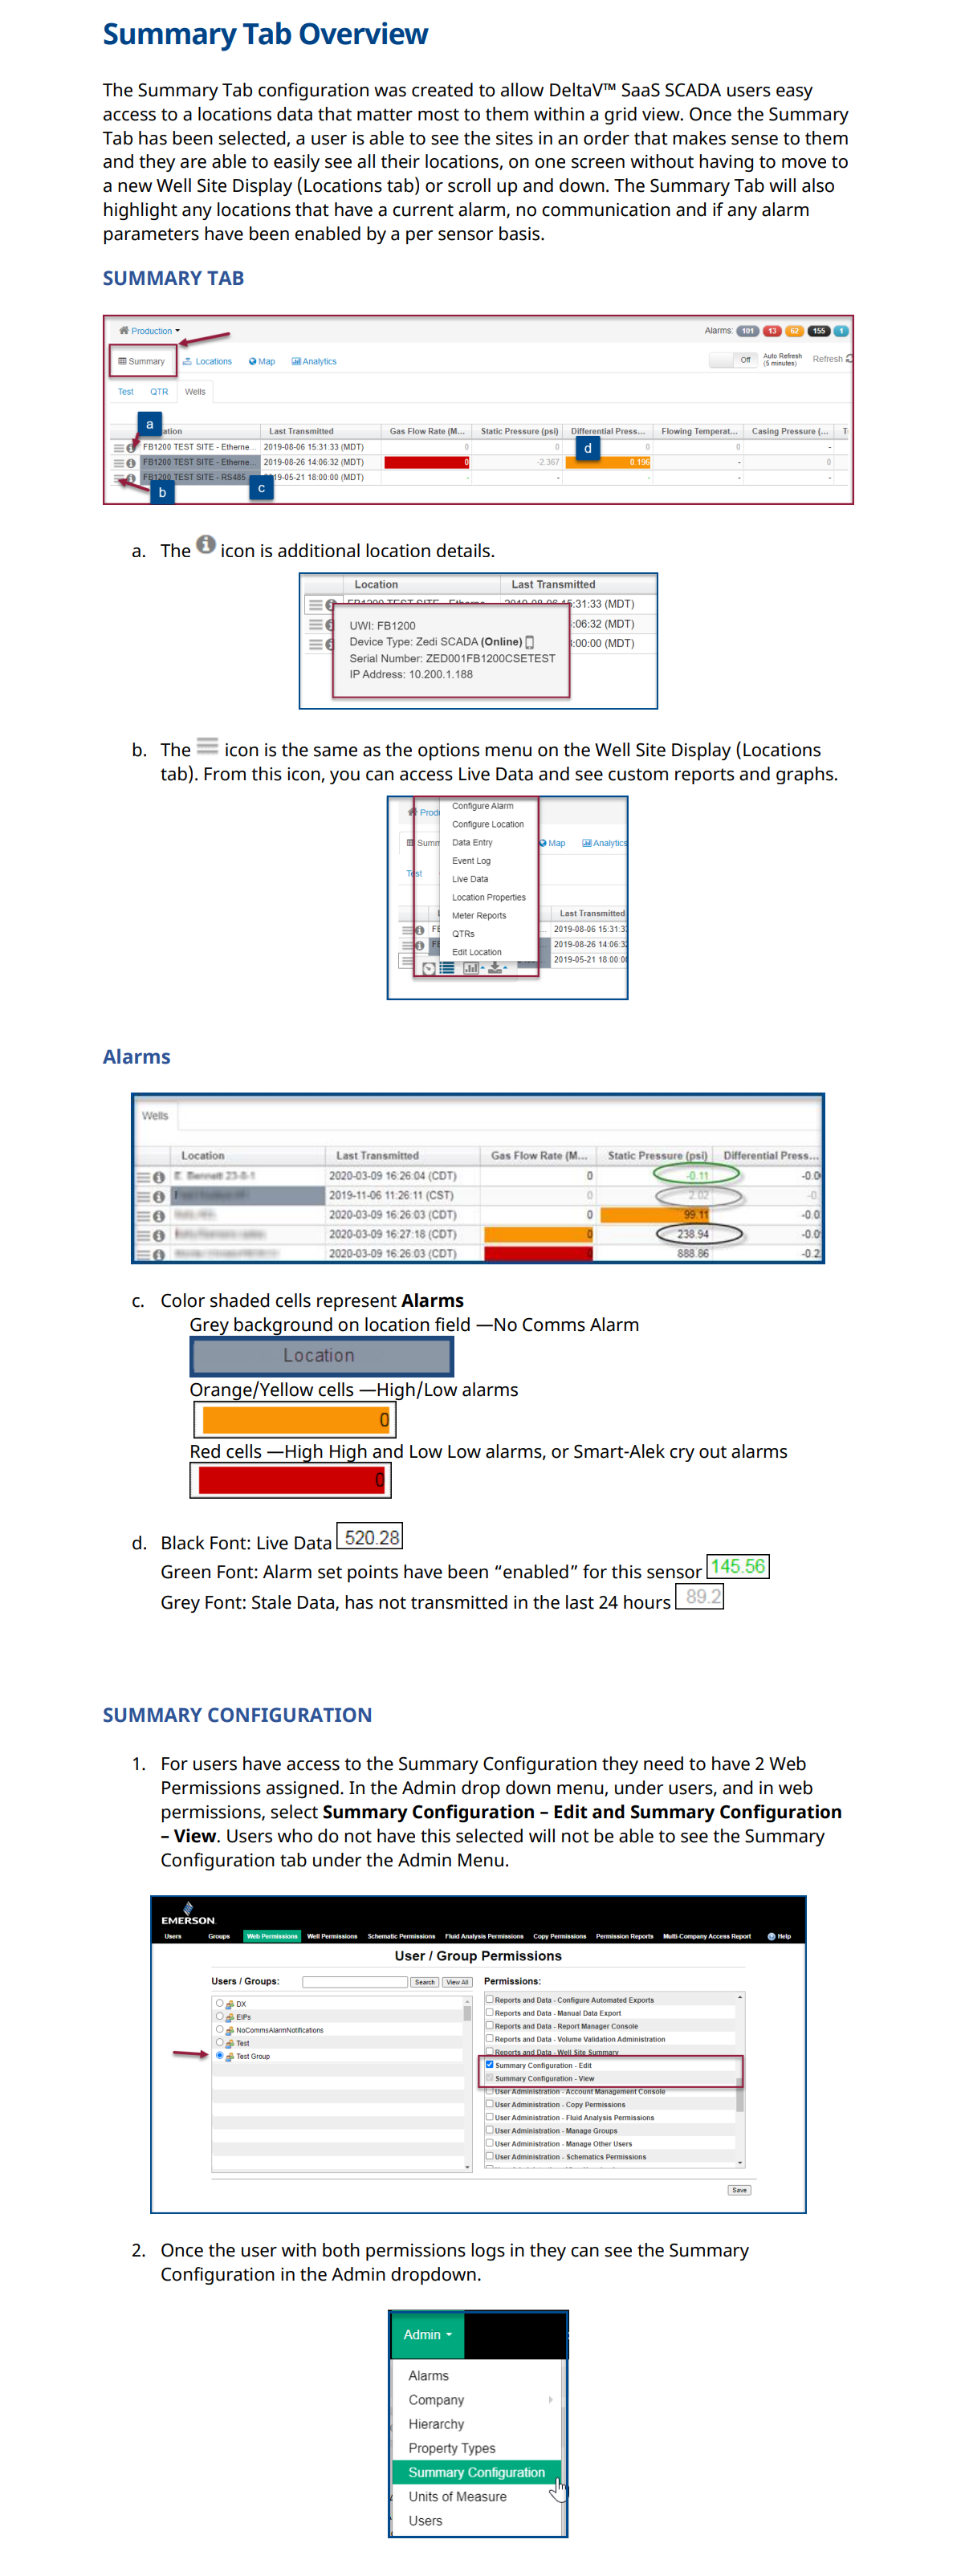
The Summary Tab configuration was created to allow Zedi Access users easy access to a locations data that matter most to them within a grid view. Once the Summary Tab has been selected, a user is able to see the sites in an order that makes sense to them and they are able to easily see all their locations, on one screen without having to move to a new Well Site Display (Locations tab) or scroll up and down. The Summary Tab will also highlight any locations that have a current alarm, no communication and if any alarm parameters have been enabled by a per sensor basis.


SUMMARY TAB

Overview 


1. From the home page select the Summary Tab.

Image 1437


    Image 1438


    a. Hierarchy for location selection.


    b. Select the specific Summary Tab.

    Image 1439


      c. Select the

      Image 1440

      icon for additional location details.

      Image 1441


        d. The

        Image 1442

        icon is the same as the options menu on the Well Site Display (Location’s tab). From this icon, you can access Live Data Screens and see custom reports and graphs.

        Image 1443

          Alarms


          Color shaded cells represent Alarms:

          • Grey background on location field —No Comms Alarm

          Image 1444


          • Orange/Yellow cells —High/Low alarms

          Image 1445


          • Red cells —High High and Low Low alarms, or Smart-Alek cry out alarms

          Image 1446


          Image 1447


          Data


          • Black Font: Live Data

          Image 1448


          • Green Font: Alarm set points have been “enabled” for this sensor

          Image 1449

          • Grey Font: Stale Data, has not transmitted in the last 24 hours

          Image 1450


          Image 1451


          Summary Configuration 


          1. For users have access to the Summary Configuration they need to have 2 Web Permissions assigned. In the Admin drop down menu, under users, and in web permissions, select Summary Configuration – Edit and Summary Configuration – View. Users who do not have this selected will not be able to see the Summary Configuration Tab under the Admin Menu.

          Image 1452


            2. Once the user with both permissions logs in they can see the Summary Configuration in the Admin dropdown.


            Image 1453

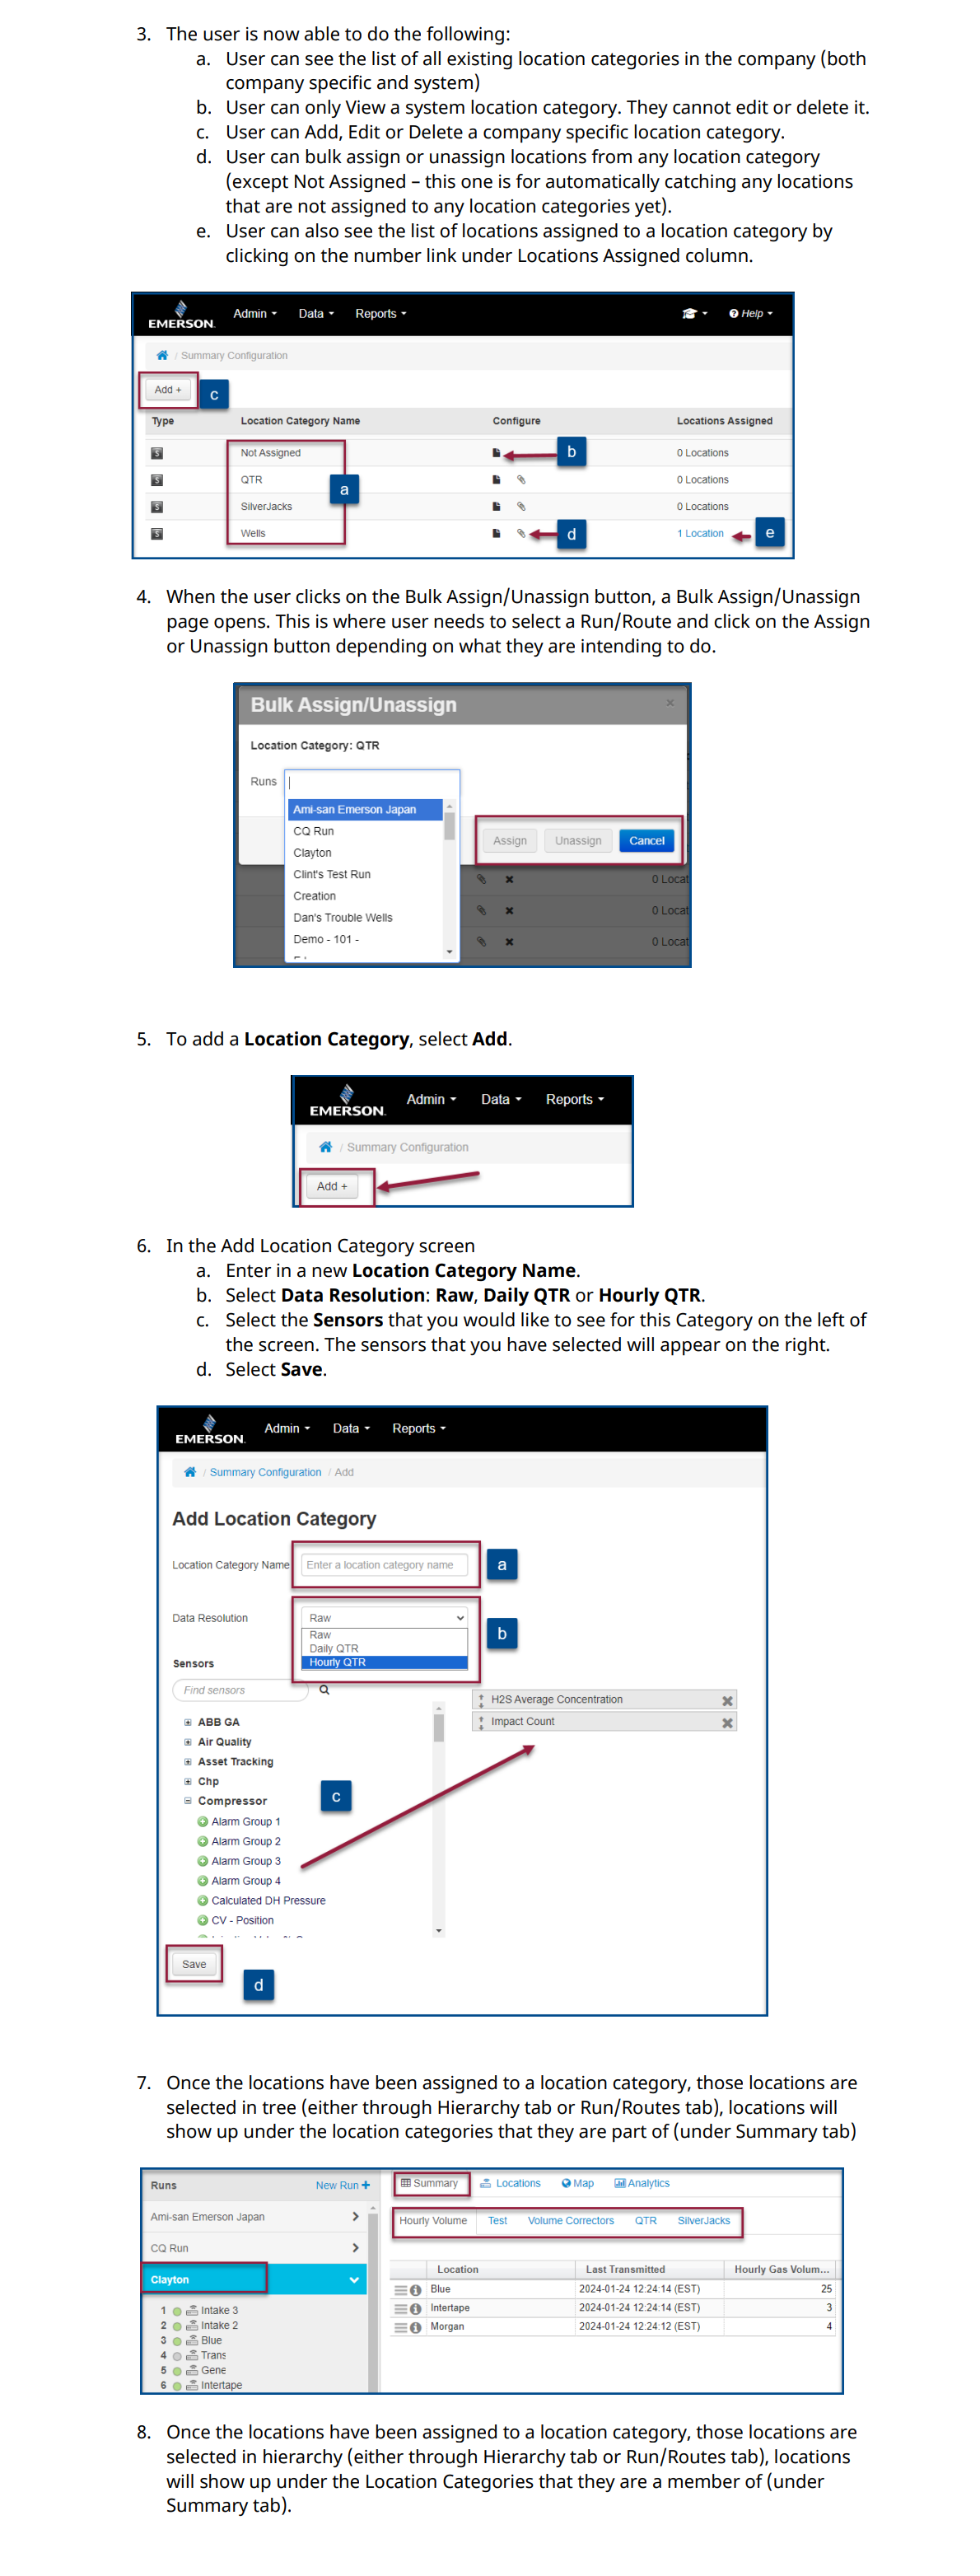
            3. The user is now able to do the following:

            a. See the list of all existing Location Categories in the company (both company specific and system)

            b. Can see a View Only system location category. They cannot edit or delete it.

            c. Add, Edit or Delete a company specific location category.

            d. Bulk Assign or Unassign locations from any location category (except Not Assigned – this one is for automatically catching any locations that are not assigned to any location categories yet).

            e. See the list of locations assigned to a location category by clicking on the number link under Locations Assigned column.

            Image 1454


              4. Select the Bulk Assign/Unassign button.

              Image 1455


                5. Select a Run/Route. Select Assign or Unassign button depending on what you are intending to do.

                Image 1456

                  6. To add a Location Category, select Add.

                  Image 1457

                    7. In the Add Location Category screen

                    a. Enter in a new Location Category Name.

                    b. Select the Sensors that you would like to see for this Category on the left of the screen. The sensors that you have selected will appear on the right.

                    c. Select Save.

                    Image 1458


                      8. Once the locations have been assigned to a location category, those locations are selected in tree (either through Hierarchy tab or Run/Routes tab), locations will show up under the location categories that they are part of (under Summary tab)

                        Image 1459


                          Should you have any questions regarding this latest update, please feel free to contact our Customer Care team 1-866-732-6967 or zedi.support@emerson.com

                          Is this article helpful for you?