Two Factor Authentication
Last modified:
Our new security feature, two-factor authentication is now available for Zedi Access users! Increasing security for your valuable data on our platform.
Did you know?
According to reports from Microsoft and Google, you can block more than 99.9% of account hacking attempts by using multi-factor authentication.
If you are interested two-factor authentication for your company, please reach out to our customer care team and we will work with your Zedi Access Administrator to get this set up for your company.
Once this feature is enabled, the next time the user signs in, they will need to set up their phone number for notifications.
To get started users will need:
- A mobile phone with text
- Access to emails
Set up
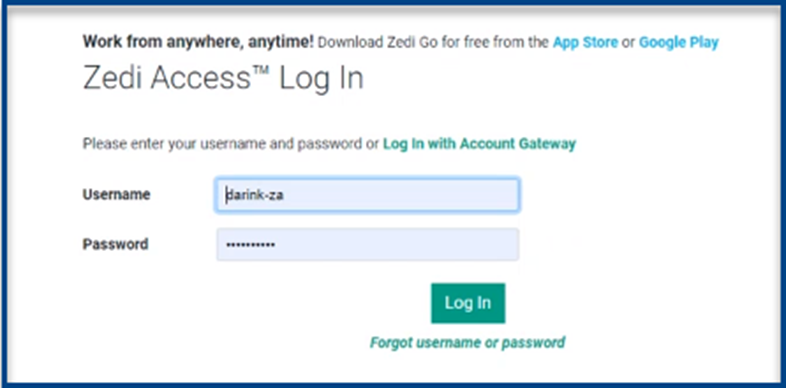
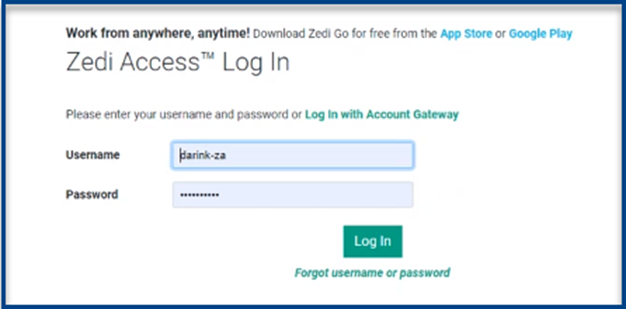
1. Enter in Username and Password and select Sign In.
2. Next this screen will appear, it will note the email that the instructions will be sent to.
![]()
This screen will only appear the first time you are setting up.
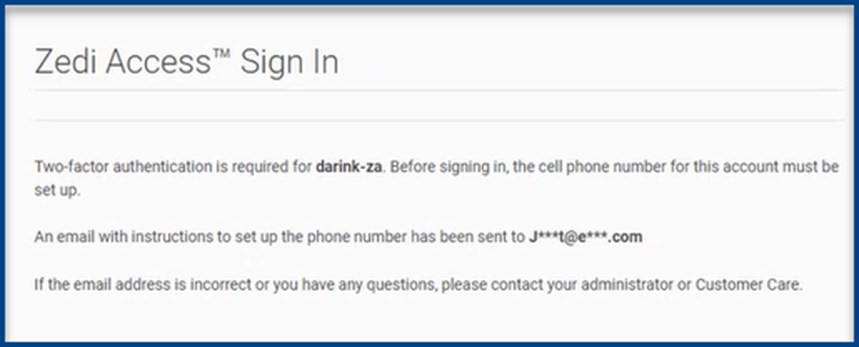
3. An email is now will be sent to the email provided. Select the link “Set up cell phone number [zediaccess.net]”

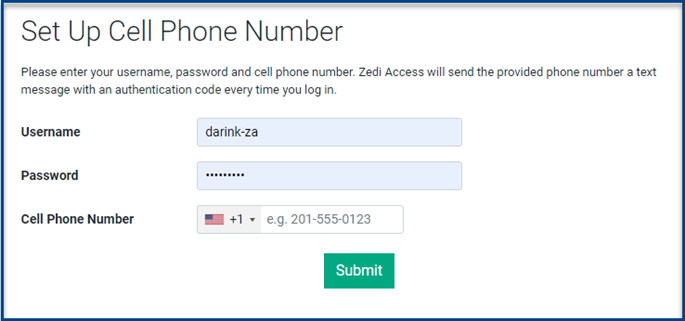
4. Enter in your 10-digit Cell Phone Number and select Submit.
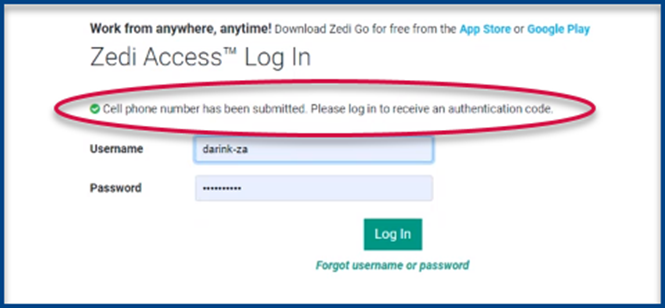
5.You will see that the cell phone number was submitted. Enter in your Username and Password and select Sign In.
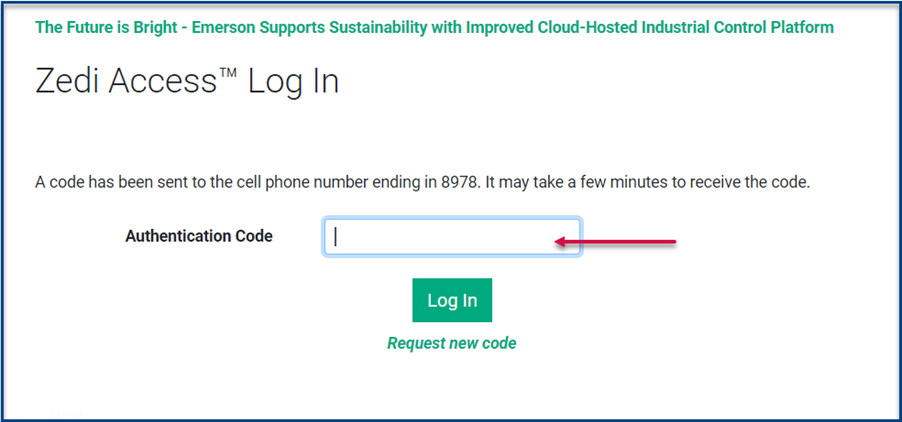
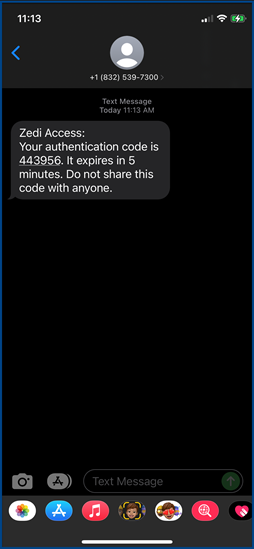
6. An authentication code is will now be sent to the cell phone number that you provided.

7. Enter in the Authentication Code that you have received on your mobile device and select Sign In.
Please do not share this code with anyone.
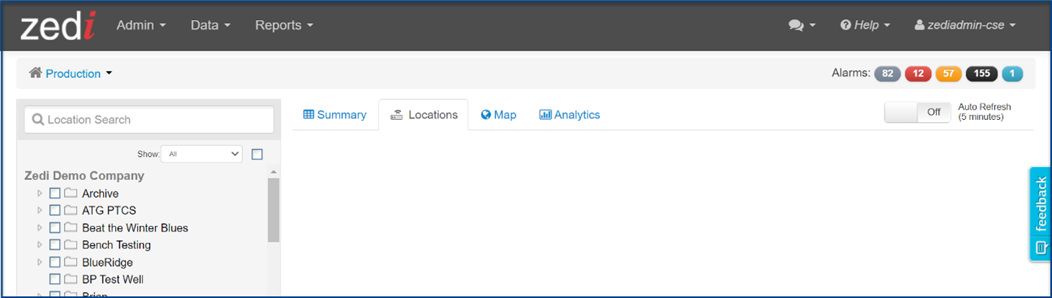
8. Now you will enter your companies Zedi Access page.
Errors
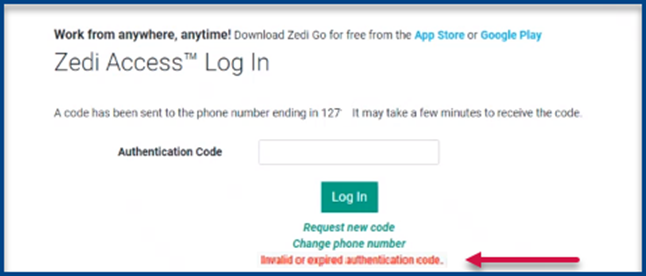
If you enter in an incorrect authentication code:
1. You will receive “Invalid or expired authentication code.” You can try again.
2. After the second attempt you will receive “Two attempts to provide authentication code have been unsuccessful. One more failed attempt will require you to sign in again.”
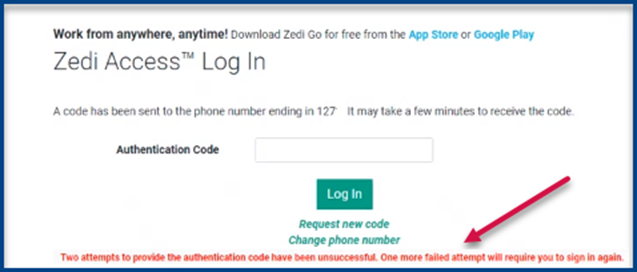
3. After the third unsuccessful attempt, you will be brought back to the login page, to start again. Sign in again and you will receive a new code. Enter the new authentication code.
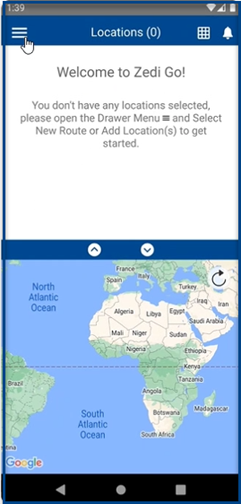
Zedi Go
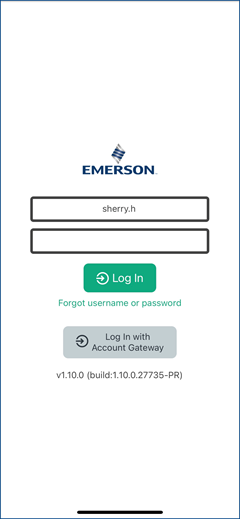
1. Enter in Username and Password and select Sign In.
![]()
If the Zedi Go App has not be updated, you will have to update the app.
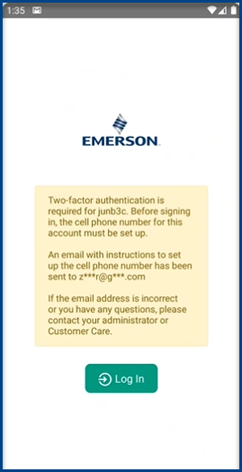
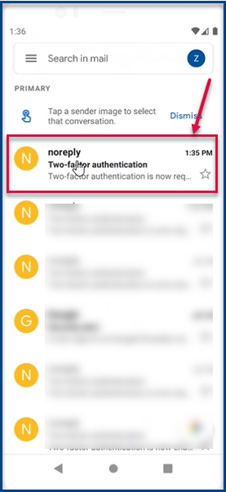
2.This screen will appear, it will note the email that the instructions will be sent to.
![]()
This screen will only appear the first time you are setting up.
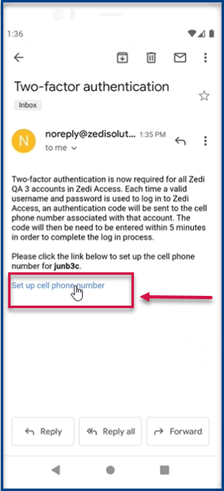
3. An email is now will be sent to the email provided. Select the link “Set up cell phone number.
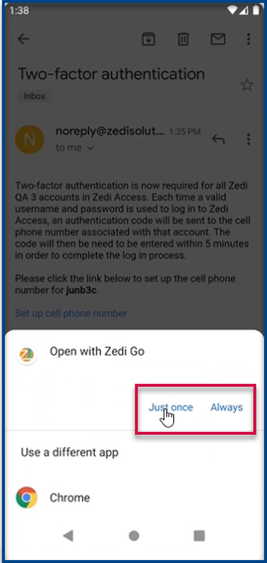
4. You will be asked to open the Zedi Go App, select Just Once or Always.
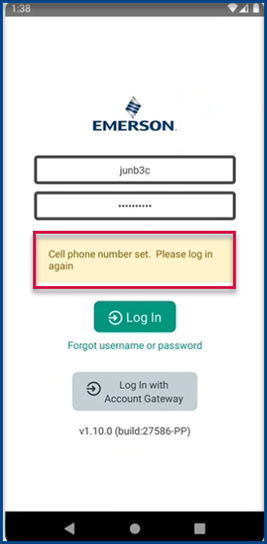
5. Once brought back to the app, enter in your 10-digit Cell Phone Number and select Submit.

6. You will see the cell phone number was set. Enter in your Username and Password and select Log In.
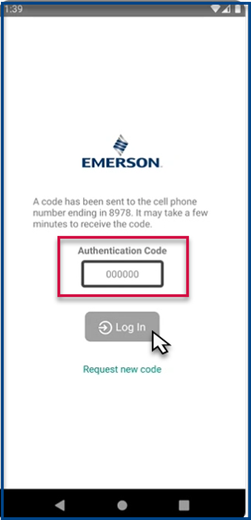
7. An authentication code is will now be sent to the cell phone number that you provided.
8. Enter in the Authentication Code that you have received and select Log In.
Please do not share this code with anyone.
9. Now you will enter your companies Zedi Go page.