Location Administration
In Location Administration enter and update location parameters as required.
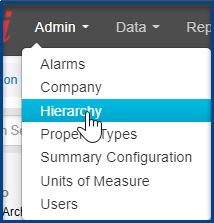
Select Hierarchy on the Admin drop down on the standard function bar.

1. Find the location on the left-hand hierarchy.
2. Click Location Admin on the right-hand side.

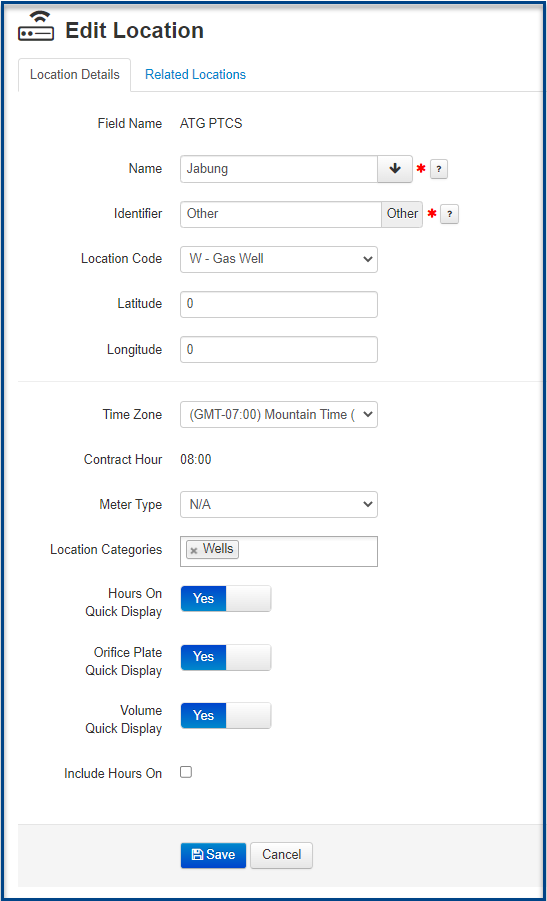
1. Field
Designates the field that the site will show under in the Well Tree in the Well Site Data Display and Data Export windows.
2. Wellsite Name/Pipe Identifier - The legal name or description of this site.
3. UWI - The Universal Well Indicator unique ID of the selected site.
4. Time Zone Sets the time zone where the site is located. This is the time zone to which the contract hour is applied. Most Reports and parameter entry dates will default to this time zone.
5. Meter Type The type of meter on this site. (Only applicable when the Excel version of the Daily Production Email is used.)
6. Latitude/Longitude can be changed to have a site show up where required on the map version.
7. Hours On Quick Display Enable the quick display of gas Hours On data for yesterday and today.
8. Orifice Plate Quick Display - Enable the quick display of Orifice Plate Diameter or eTube Beta Ratio for Smart-Alek Field Instrument sites.
9. Volume Quick Display Enable the quick display of gas Volume data for yesterday and today.
10. Include Hours On - This feature is for Plunger lifts, as they are discontinuous, and the actual hours on may vary. When selected this will over-ride the actual hours on production with 24hrs if the parameter is more than the user defined threshold.
Example: If the user sets the threshold at 8 hrs and checks off the “Include Hours On” box, everything over 8 will be rounded up to 24 hrs to indicate normal operation. Anything less than 8 remains at the actual hours to indicate there might be an issue (i.e. less hours on production than expected).
When hours on is selected, you will be required to set a threshold. The default will be 24 hours.

11. When you're finished entering the new parameters, click SAVE

Customer support service by UserEcho

